Digital Media Collaboration: Week 10

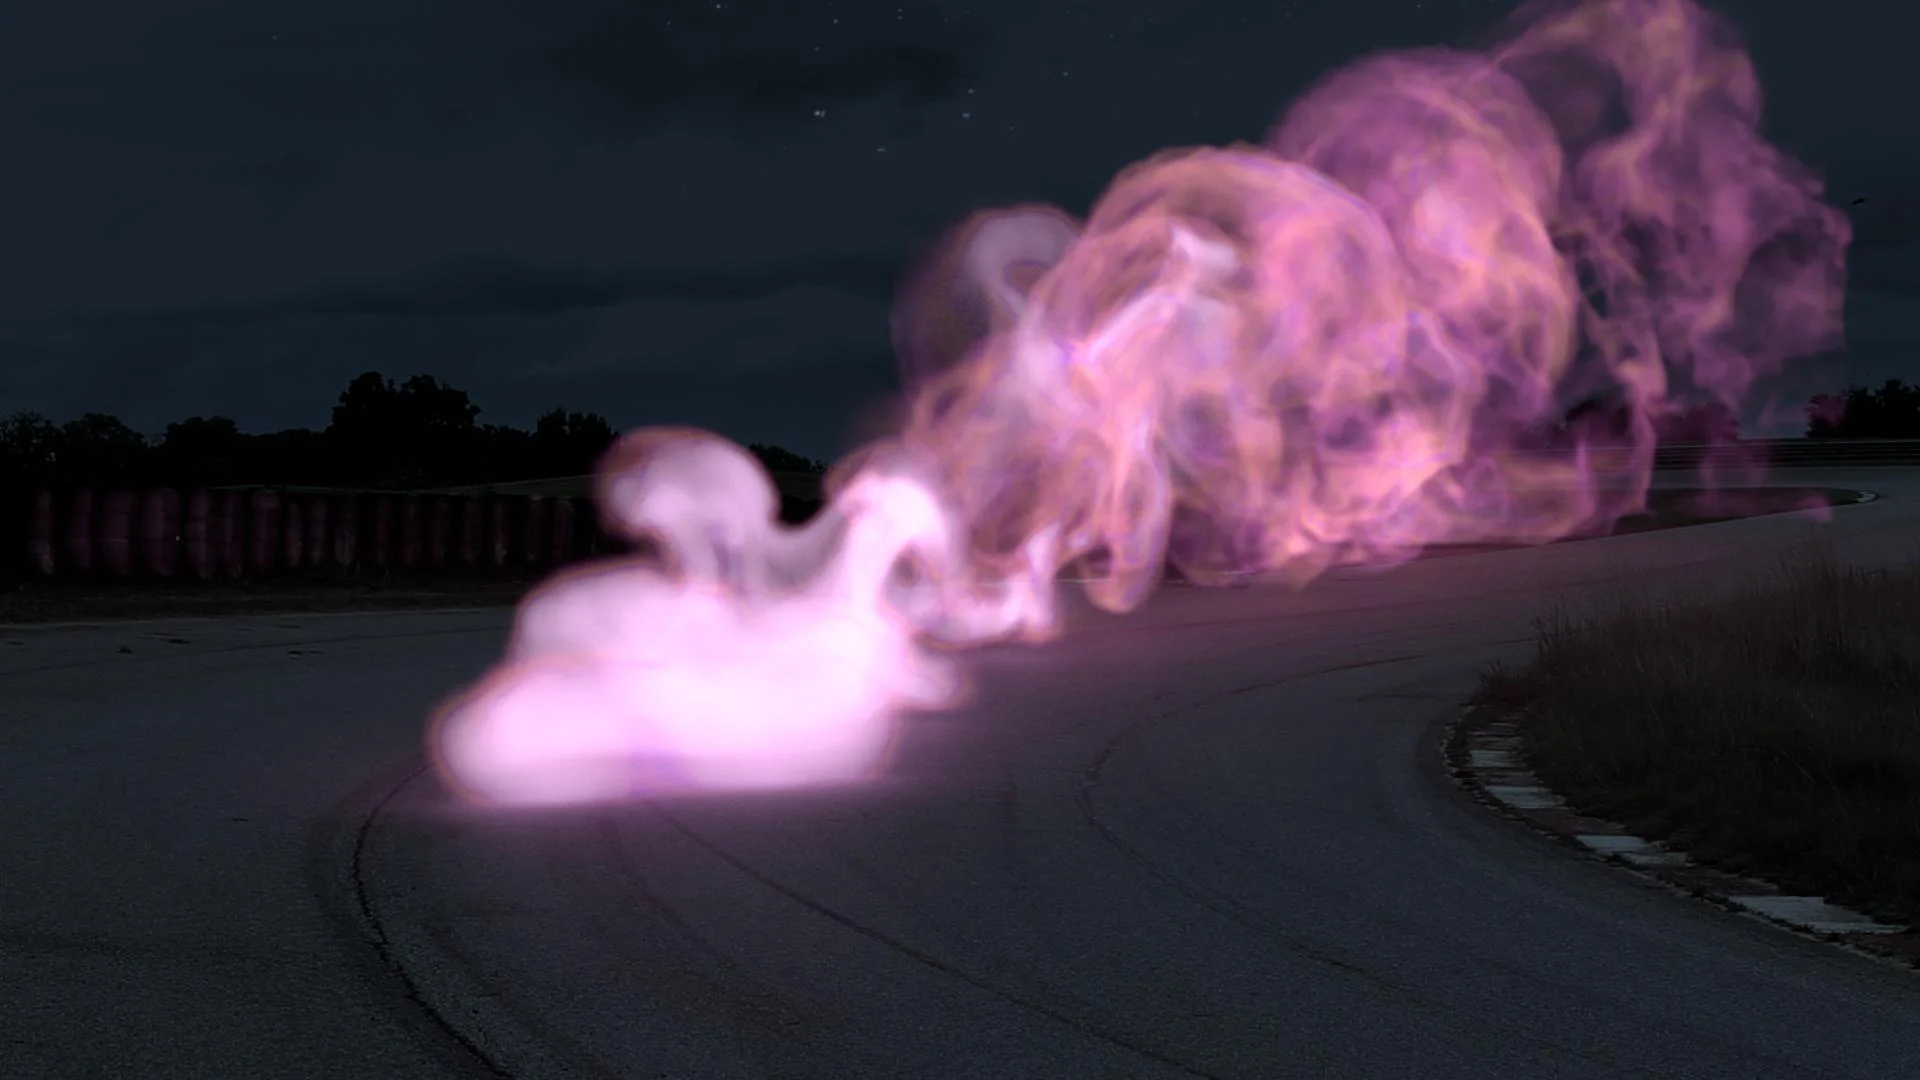
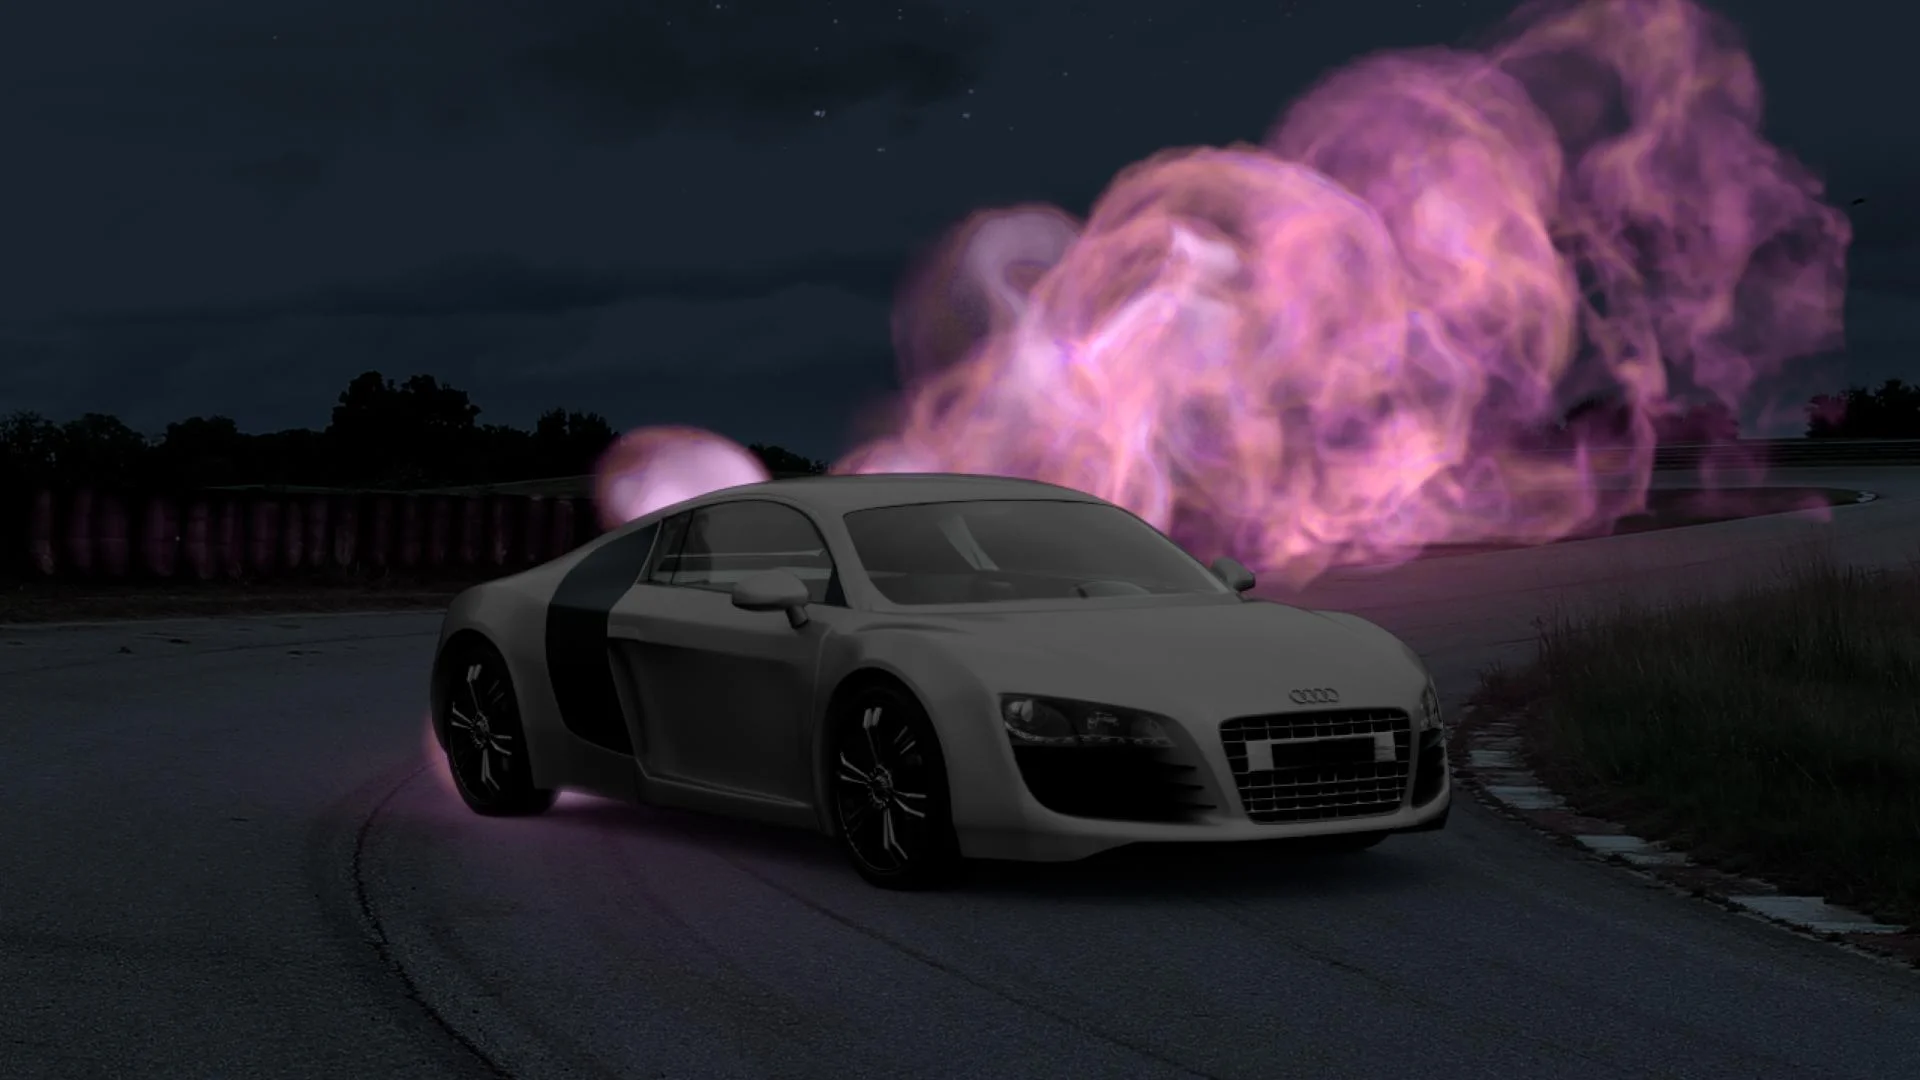
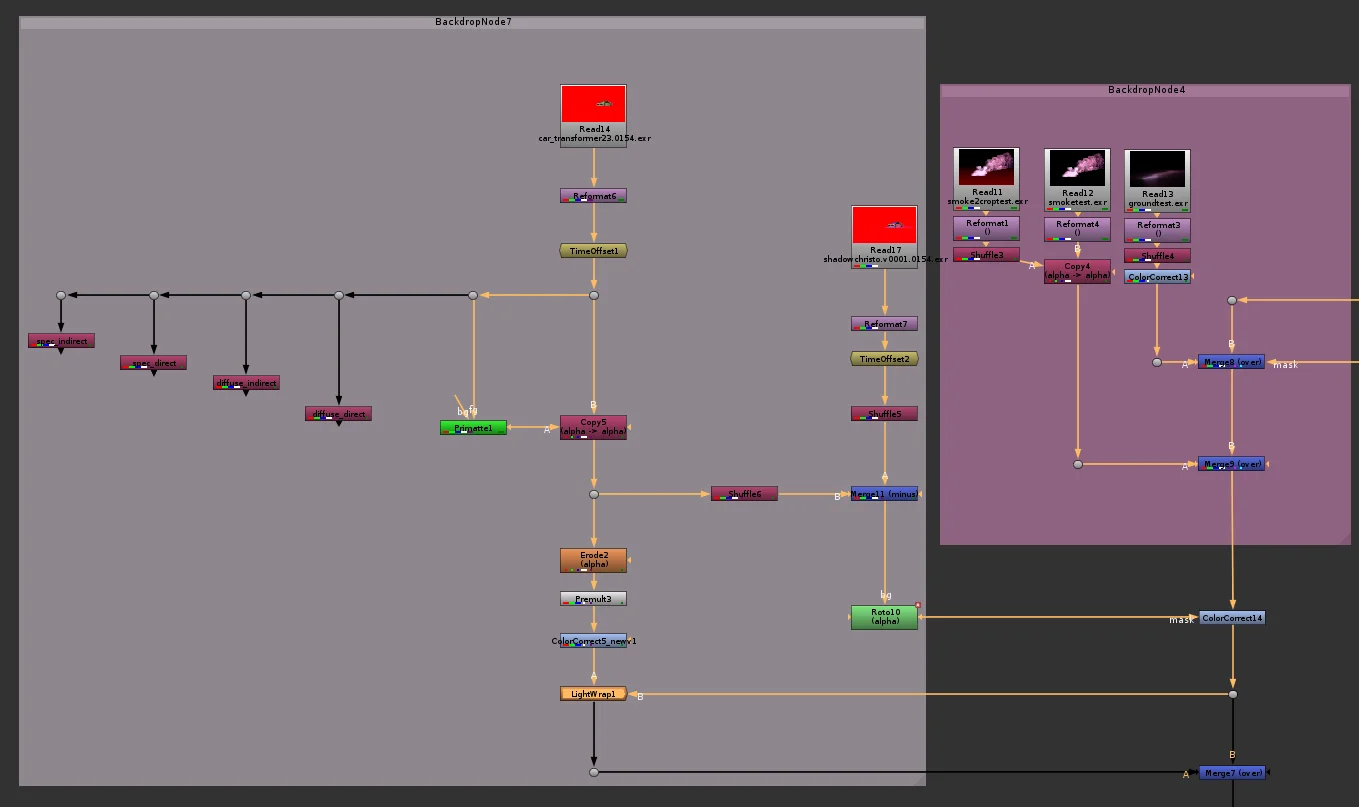
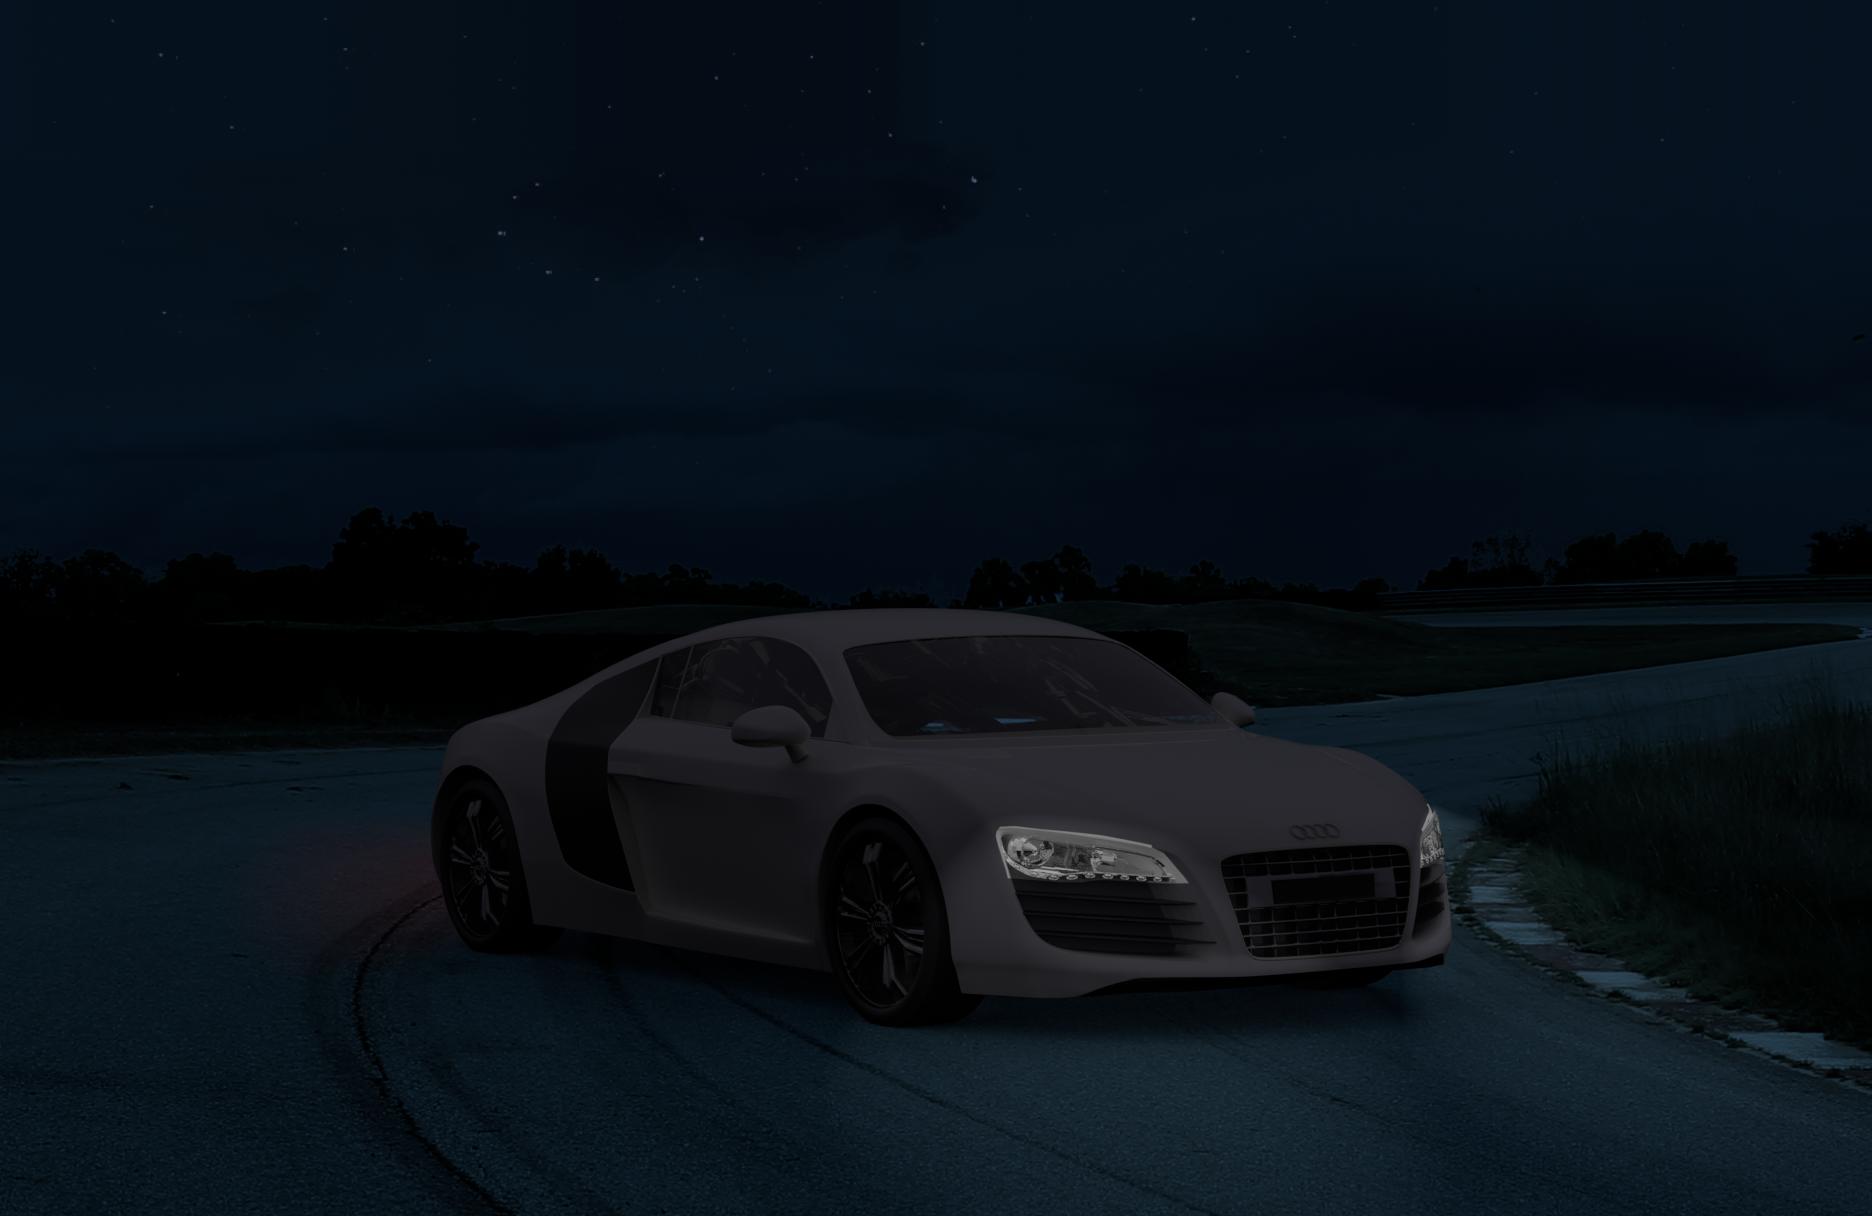
We made it to the end of the quarter! We made a few noticeable changes to the project since last week. The major ones being an edited HDR for the close up shot, some updated particles for the dragon, and some more roto work to get some pink spill light onto the background plate. I was focused on the roto work and making some final comp adjustment while Christo made the HDR adjustments and Zach added to his particles. Zach also helped me out with the composite by adding in some color corrections to his particles to help show more of the detail in them. Here is our final version of our project.

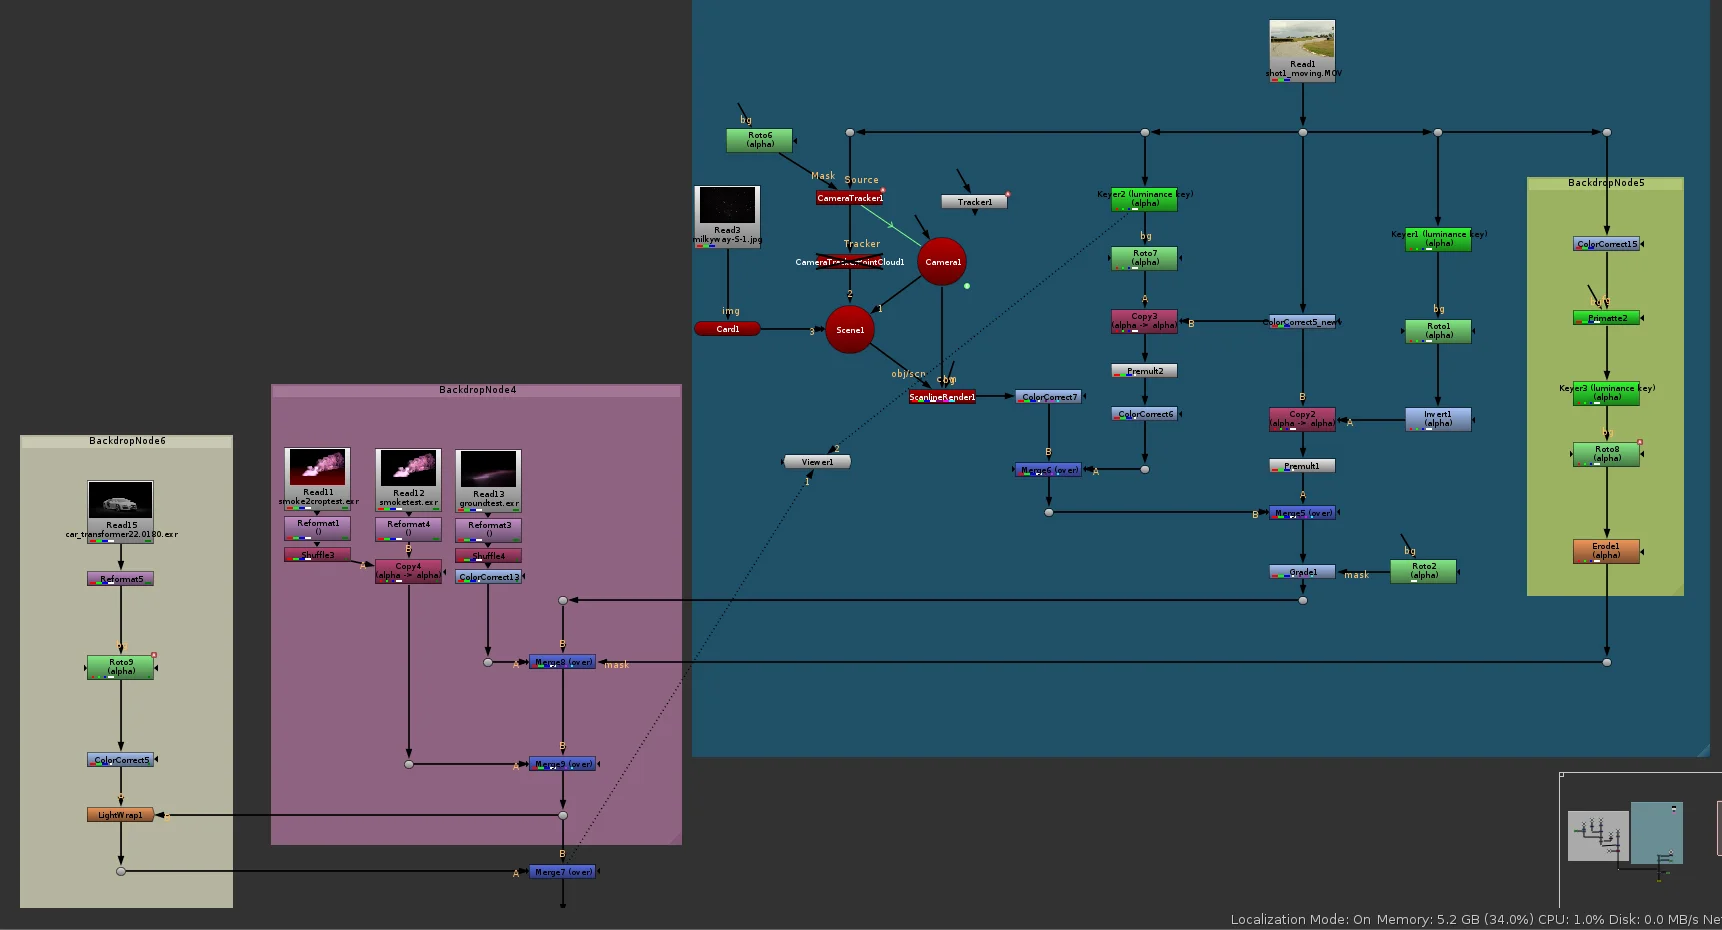
I also made a breakdown for each shot, and have the nuke trees for each shot.

I had a really great time working on this project and I’m really happy with the final result. Not only did I enjoy working with my two group members, Zach and Christo, but also working along side everyone else in the class. Thank you to Professor Bridget Gaynor and Professor Deborah Fowler for all your help on this project and of course thank you to our mentors, Kyle, Billy, Todd, and Cat, over at The Mill NY.

Digital Media Collaboration: Week 9

This week was the last full week for changes for this project. After this week we only have a weekend left to make adjustments so we really needed to do as much as possible to get this close to being a finished product.

For compositing adjustments I made this week I brightened the sky but took down the stars some more, there also a few clouds in the sky. I adjusted the blacks for each shot but will continue to adjust them to get them closer to matching shot to shot. All shots also now have z depth and motion blur. I also added more layers to the lens flares to make them much brighter.

For the close up shot I added some clouds to help create depth. We adjusted the rim lighting as well and added another layer where I could brighten the whole head and darken the wings to help make it stand out.

In the drifting shot we added a layer for tire tread marks on the road which I think helps to ground the car in this shot.

Below I have our current edit, and a breakdown with the nuke scripts for each shot.

We still have a few more things to tweak and a few more rotos to add but next we will have our final version of this project!

Digital Media Collaboration: Week 8

This week we made a lot of progress on our project. A big change we made in our project is changing the color of our car. Our car kept feeling not very reflective and that’s partially because it’s difficult to see reflections in a white material compared to a dark material. We also changed our HDR to one that Zach went out and captured at night. Now that we’re getting into more final stages I’ve also been able to go into some more fine detail comp work and have also added some new layers to the render to help get the look we want. Here is our current edit of the video and below I will go into more detail some of the things I’ve added.

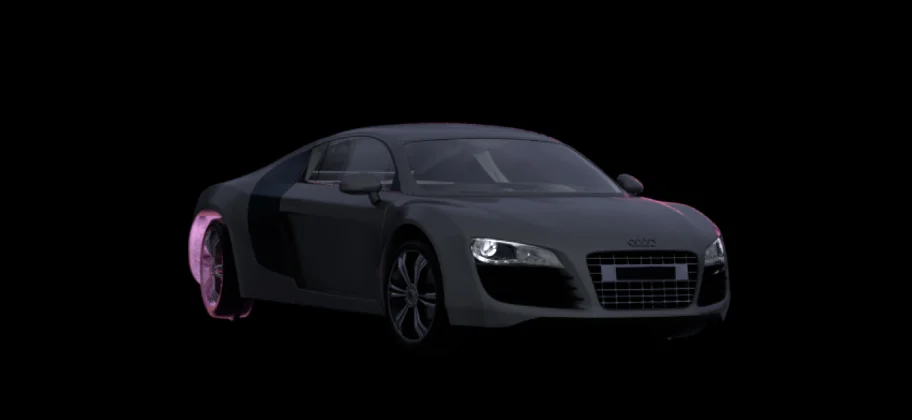
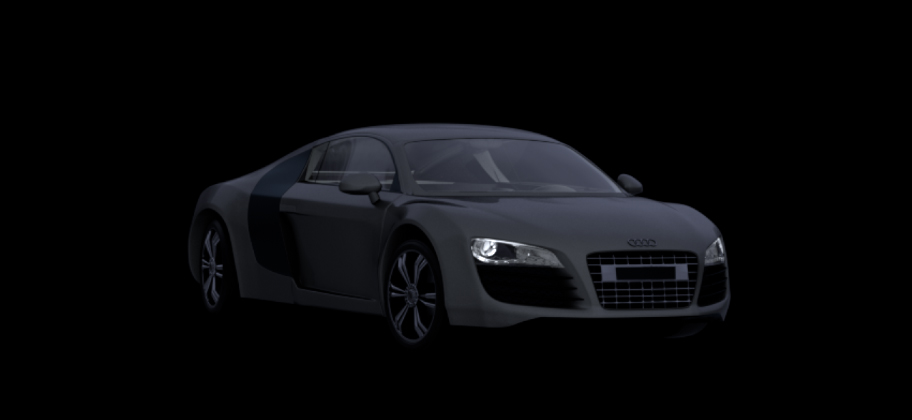
One of the layers I created was a fresnel layer, it’s created using a surface shader with a RGB ramp that is then placed on the object based on where the edges of the object are in space from the direction of the camera, so areas furthest away from the camera are red and closest are blue. Then I can shuffle out a mask using the red channel in nuke. I’m using the red channel and a basic roto to add more pink light over the top of the car based on where the particles are. One of the constant comments we were getting was that there was not enough pink light on the car from the particles and instead of pushing the light further in houdini I thought using this technique would be faster and give us more control over the result. Here’s the before, the fresnel render layer, the red channel from the fresnel render, the roto, and the result of that mask being used to add pink on the car. I also have another photo below showing the fresnel layer at a different angle to show how it’s changes based on the angle of the car.

fresnel_test.0182.jpg

I also created a separate layer for the star reflection so I could then add in the stars on top of the reflections of our HDR. I’m still not too sure if I’m happy with the size of the stars yet, I feel like I’ve made them too hard to see now but It’s still something small I’m adjusting. Here’s the before and after of those stars being added.

Another render layer I’ve made is just getting the reflection of the ground onto the car separately, that way we can brighten the ground reflection a bit to make the scene feel more integrated.

In the close up shot of the dragon Christo and I worked together to create a special layer to add some rim lighting to the head of the dragon to help separate it from the wing. We use a similar idea to how I made the fresnel layer by creating a render layer where I could pull out a red green or blue channel to make a mask. We placed three different lights in the scene, each one being an RGB value, and then placed them in three different places. One was more towards the front, another towards the middle, and the third towards the back. We also put a plain aistandard shader on the dragon. Then in nuke I looked at the three different results, we liked the red channel best. I then used the red channel as a mask for a color correction on the head to make it pop out a bit more from the wing and background. Here’s the before, the results of the render layer, the red channel that’s being used as a mask, and the results.

For that same close up shot of the dragon we were getting really bright hot spots on the dragon coming from the spot light. In order to still have that specular highlight but control it more we separated the HDR and the spot light into two different render layers. Here’s the before, the dome only render, the spotlight only render and the combination of the separate layers

With this close up shot I’ve also been trying to show the motion of the dragon flying through the sky. Right now I have the dragon on a card in a 3D scene and the sky on a much larger card. The camera and dragon move together to give the stars a slight parallax. It still feels like there’s not as much motion as there should be so I might try adding some clouds moving in the foreground and background to give the scene more depth

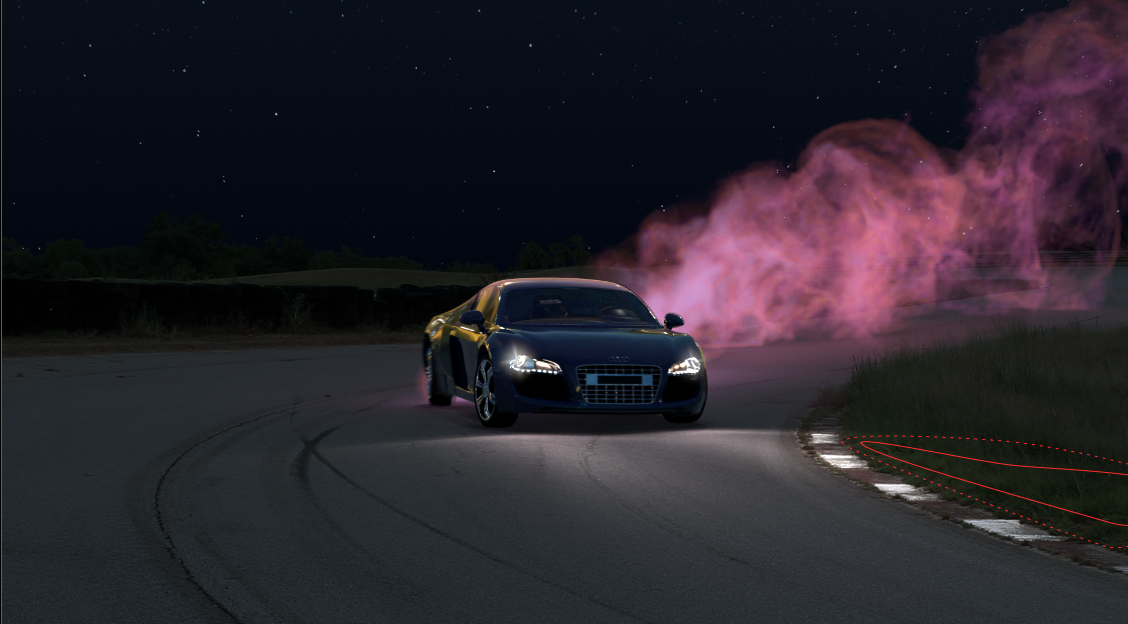
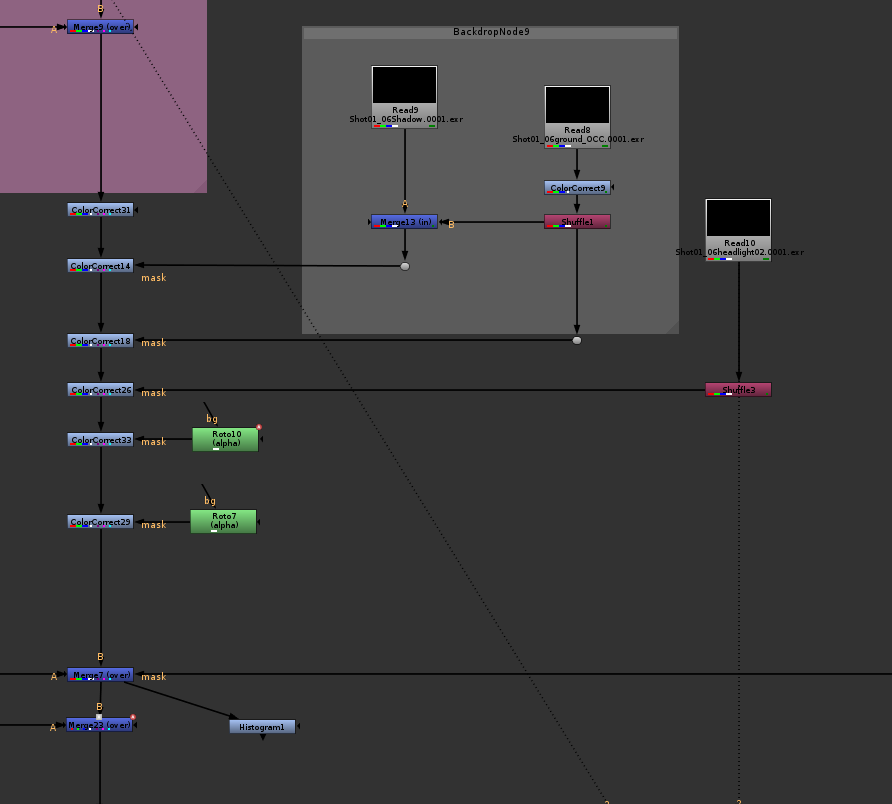
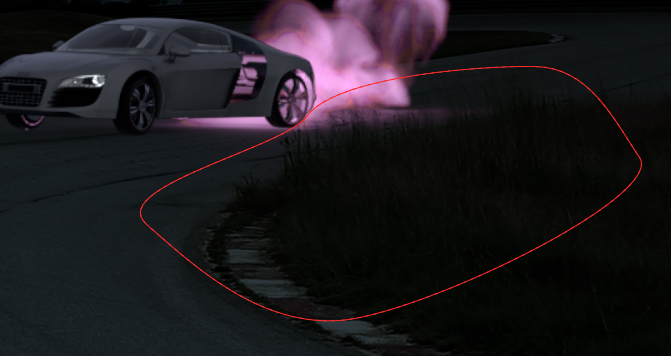
Something else I added this week was some rotos on the white areas along the sides of the track in the landing shot. Those area would be reflective so they should get brighter when hit by the headlights. In order to do this I just rotoed each one, and set key frames for when they were active and had that mask a color correction. I also added a roto to the grass area on the right to add some more contrast to the grass when it’s hit by the headlights. Below I have a picture of before, screenshots of my rotos and the result of the rotos and color corrections.

A few other things I did this week was fixing the track for the landing shot so the sky doesn’t slip anymore. I added some lens flares for when the headlights face the camera, so far I’ve only layered two different flares for each light. The renders also have motion blur now, I added motion blur in nuke using the motion vector aov from the renders.

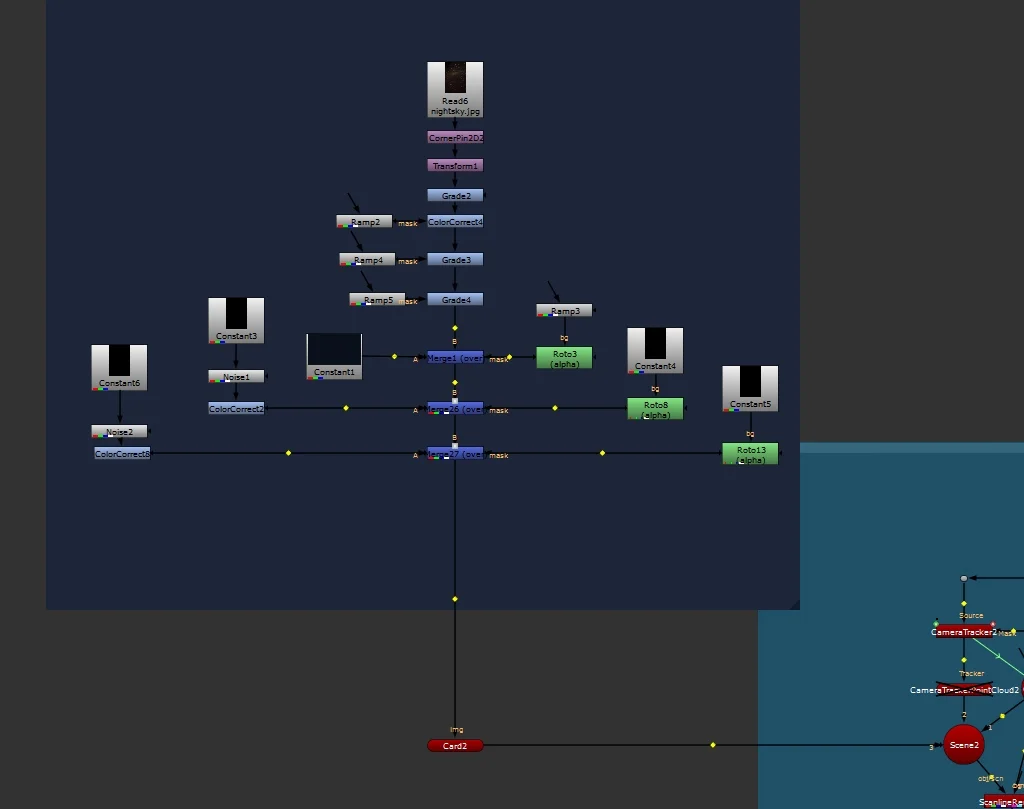
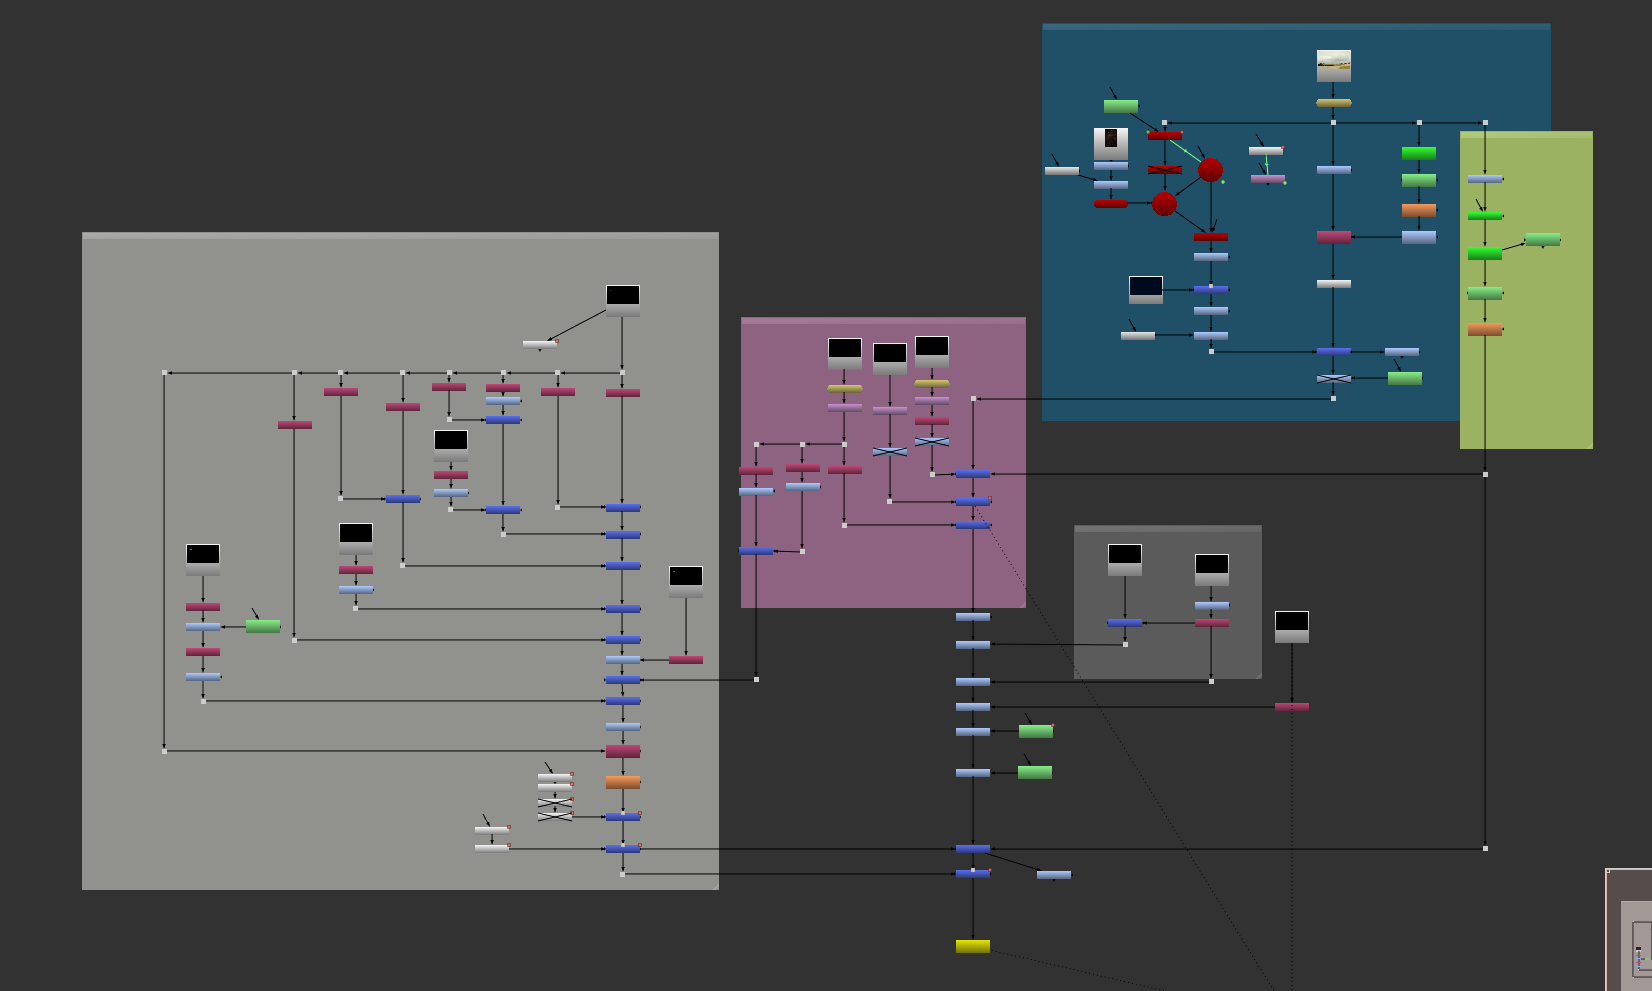
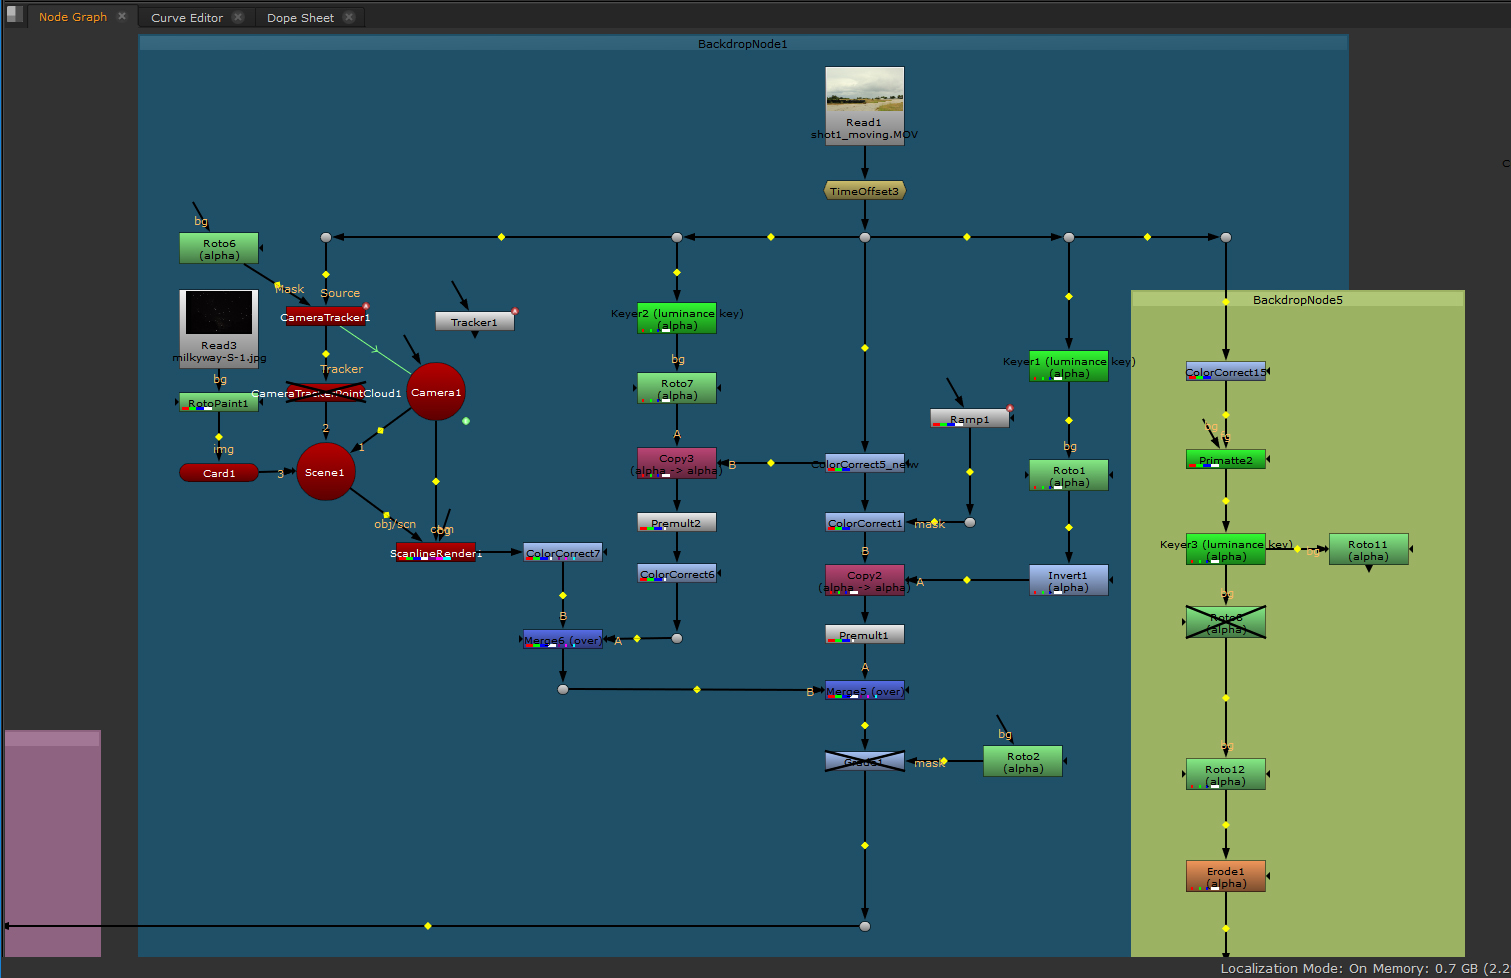
Below are my nuke trees, first is the landing shot which is one big tree that I’ve taken smaller screen shots of to show what I’m doing in each section.

Second is the close up shot.

And here at the end I have the tree for the drifting shot.

s2nt.jpg

Digital Media Collaboration: Week 7

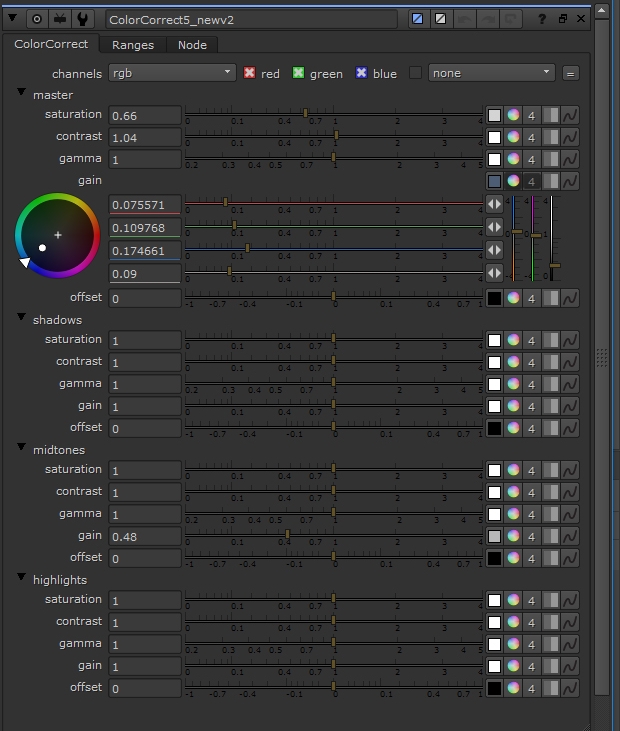
Something I felt I made a lot of progress on this week was my day to night. I was feeling somewhat stuck with it where the scene was feeling too dark but it would look to bright when I made it brighter. I ended up doing a sky replacement and made a starry night sky and made the ground a bit brighter. I feel like it’s balanced out the darkness of the scene well. I applied a similar color correction to my other comps and hope to finalize these or only make slight adjustments if needed. Below I’ve included a video of my day to night, my nuke tree, and the main color correction I’m using for the ground.

nktreedaytonight.jpg
s1maincc.jpg

We also added a new shot into our scene that cuts into the middle of shot 1. It’s an up close shot of the dragon flying through the sky. I think the specular high lights being made from our key light are too bright so I recently added some new render layers to this scene to sepereate the key light’s direct specular from the hdr’s direct specular. We haven’t rendered this out yet but I hope to test it out this weekend since I think it’ll allow me to bring down some of those really bright highlights. I’m also using the indirect specular to add pink onto the dragon and using a ramp on this color correction as a mask to make it stronger in the back. This is suppose to looked like the light from the particles in the back shining onto the dragon. I have my current comp of this shot below along with it’s nuke tree.

nktrees1b.jpg

Below is our current edit of what we have.

I also tried testing some lens flare effects on the headlights in Nuke recently. I’ve been using the flare node but it’s still very new to me and I feel like I need to do more testing with it. I just added two small flares on the main headlights, I’m like the one on the left better right now, the one on the right feels too fake. I also think I need to layer more types of flares on top of each other to get it to look more natural. I’ve also been look at the Audi space ad for examples of headlight flares. I put my current test and a lens flare example below.

lensflare.jpg

Digital Media Collaboration: Week Six

This week we worked on getting a composite with everything we have so far so we can really start figuring out the changes we need to make. This is our most updated version of the shaders and it has the particles from around frame 140 to the end. We plan on adding particles in the earlier parts and I’m still working on getting the day to night right. The shadow for the car also needs fixing and there are somethings we’d still like to add, like light from the headlights and background tire geometry for the particle light to shine on.

I also have some of the different layers were using for the car below. Some of them include AOV’s for the car and the reflection layer we’re rendering out of houdini to add in the reflection of the particle’s light. I also have a video of the car composited alone without the particles.

I created an alpha channel for the grass which I show how I use it to put it over the car below. I also use the same method to put the tree over the dragon. If I have time I’d like to try to see if I can animate the grass and tree to react to the motion of the flying and driving happening near it.

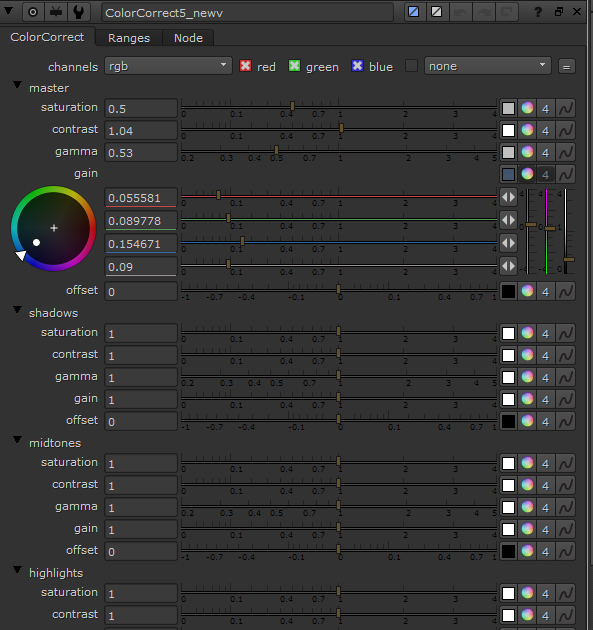
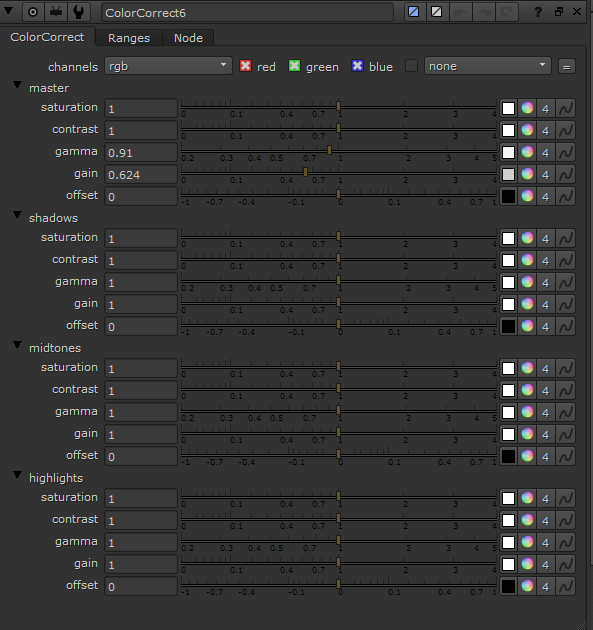
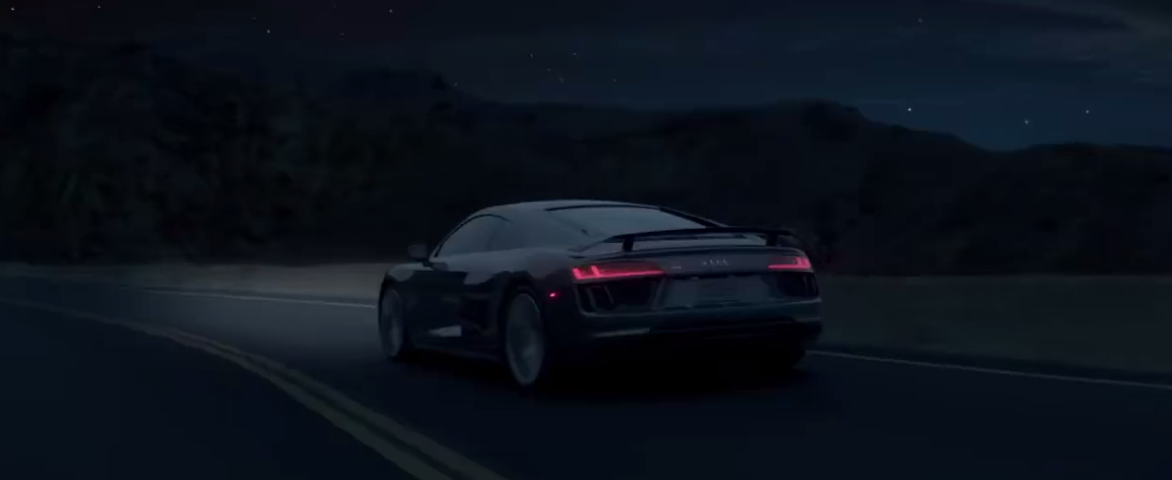
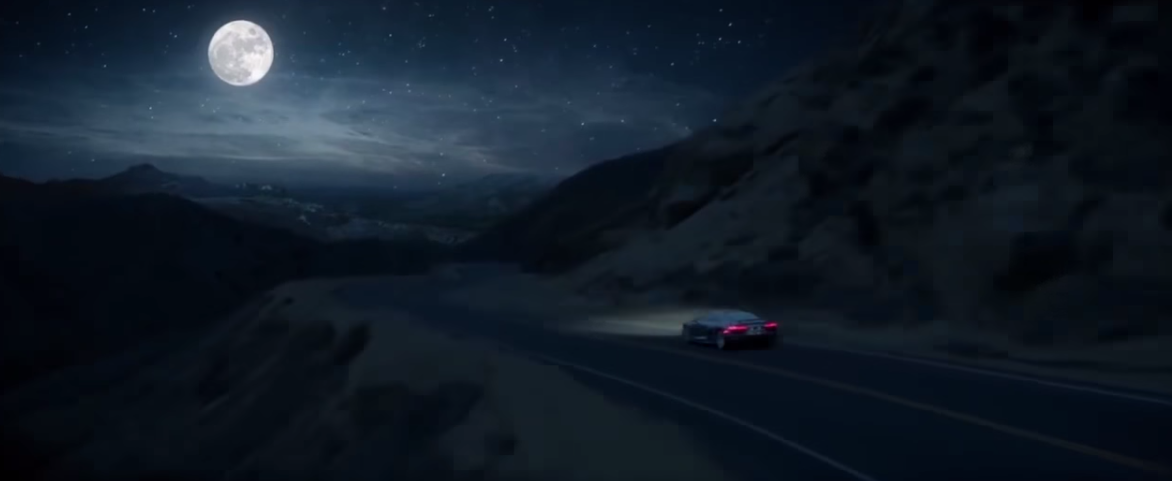
Below I have my main color correction for the ground and then the color correction I’m using on the sky. I’m also including some screenshots I’m using for reference for my day to night, they are from the Audi R8 Space ad. I also recently tried adding a ramp in the scene to adjust how it’s looking, the updated result is in the video below.

Here I have all my node graphs which are broken down by color. I’ve included close up pictures of the different sections. The blue area focuses on the footage, the green is where I create the alpha for the grass, the pink is the particles, the light grey is the car, and the dark grey is the shadow of the car.

Digital Media Collaboration: Week Five

This week a really important step for me was getting a composite of the particles on to the back plate. The particles, created by Zach, emit light and are meant to look like the nebula effect in our original inspiration for the project. I also added roots on the tires in the background to make it look like the light is hitting those tires. We plan on trying to add in reference geometry for the tires so then we can get more accurate lighting, I only did the rotos just to see the difference having that light back there makes. I have two different versions here of the composite, one with just the particles and one with Christo’s render of the car.

particles_comp_ngrasswtires.jpg

In the composite with the car I added a slight light wrap to try to mimic the light reflecting and falling on the car. We plan to try to create a layer on the car in Houdini where we can get the reflections of the particles on the car and then I can add that in on top of the render of the car. This render of the car is also not our most recent version of the shaders. We have the shaders updated on a turntable and hope to get renders of the car for the backplate soon. In this new version of the car headlights have been added so that should add to the light being seen within the scene. If we have issues with the scene still being too dark then I believe we could add in some moon light to help lighten the scene.

I also created a mask in nuke for the patch of grass on the lower right. Not only will the car pass behind this grass but the light might affect it different as well. I am still testing with that mask and would like to do more tests once I have a render sequence of the particles and car instead of just a still image.

I finished the day to night on the footage. I still may make adjustments on how dark the scene is. I was able to set this version up similarly to how I set up the still image I did for the day to night. I just had to key a few rotos and create a 3D scene for the image of the night sky I added in behind the clouds.

I also have a render of the car moving at night but again these are not the most updated shaders. There were also some render issues that I tried to fix in nuke just so I could start seeing the car moving at night. I was having issues with the render having a red background with no alpha channels so I was having to pull an alpha channel in nuke by keying out the red. I also had issue with creating the shadow layer but again was able to find a quick fix in nuke just so I could start to see what it’s looking like.

car_nuke_tree.jpg

Digital Media Collaboration: Week Four

My main focus this week was tracking both shots so we could get some previs with the footage we shot. I was able to get some good tracks of the footage that had no trackers on it so I won’t need to paint out any trackers. I did feel like I was struggling with figuring out the scale of the scene and placing reference geometry. This made me worried about passing off the exported camera but Christo seemed to have no trouble using the camera and made this previs using the camera.

I also started working on a day to night on the footage. I tried using a keyer to make a mask for the sky so I could adjust it separately. I also used another keyer to try to make some transparency through the clouds so I could add some stars within the scene. Here is what it’s looking like right now and my nuke tree for it.

daytonight.jpg
daytonight_nuke.jpg

Christo had also rendered a frame of the car with a few different render layers so I used them to make a quick comp just to see what it’s starting to look like. I would like to rerender the car and change the render layers more so I could adjust more elements in nuke. I also tried adjusting that render to fit on the night time plate. I made a version where I only adjusted the car and then I also did a version where I rotoed in the head and tail lights so the scene wouldn’t look so dark. I also have the nuke tree for those composites.

fullnuketreev1.jpg

I also updated my shaders and light rig. I used the HDR where I painted all the equipment out and tried to fix the flatness in the render but I still feel like it’s feeling flat since there is no strong light source.

I tried adding a key light with my HDR to see if that would help and I also did a test of using an AiStandard light dome and using sphere geometry with the HDR projected on.

Digital Media Collaboration: Week Three

A major thing our mentors at The Mill asked us to get after our session in week 2 was initial backplates. We went out to the racetrack on Sunday and it was cloudy all day, which was exactly what we needed. We were able to film multiple takes of both shots and take our HDR. For the HDR I painted out all the camera equipment and us in order to have better reflections on our car.

shot1HDR.jpg
shot1HDR_paintout.jpg

When shooting our shots we decided to take at least 3 different types of takes, one where the camera is moving how we want it, another where the camera is moving that same way but has trackers in it, and lastly one without motion. The importance of taking one without motion is just in case the tracking isn’t looking right, it’s also helpful to use as a clean plate if I need to roto something out. I also wanted to film a take without trackers just in case the scene is easy to track, because if the one without trackers works well then I wouldn’t have to paint out trackers which would give me more time to refine other elements in the project.

We also started working on our light rigs and shading the car. I feel like I still have a good bit of work to do on my shaders. I also think that the HDR feels like it’s not doing much since it is just an overcast sky. Here is the video of my light rig and some of my shaders.

Digital Media Collaboration: Week Two

We most worked on refining our pitches this week. We put time into gathering things that would be helpful to explain our idea and show that it’s possible. When thinking of how to film this we agreed that filming during the day and doing a day to night matte painting would be easier than filming at night. I did a really quick day to night matte painting of one of our location pictures to show what it might look like.

locref2.jpg
unnamed.jpg

In order to successfully pull off the day to night matte painting we want to film while It is cloudy outside so there are no harsh shadows. We also agreed it would be beneficial to get reference photos of the racetrack at night. This way I could compare my matte painting to actual pictures of the same location at night in order to make it look more accurate.

I also did a paint over of a screenshot from a Pennzoil commercial that we would like to inspire our second shot

paintover_scene.jpg

We’re mainly focused on the angle and motion of the shot which is why a paint over helps to give an idea of what it’ll look like with our car and effects in it.

We also talked about what color car would be best for our project. Currently we feel that a white or light grey color would work best. Since our scene takes place at night a dark car wouldn’t stand out enough in the dark lighting and a brightly colored car is likely to clash with the colors of the galaxy effect. There are pictures of the Audi R8’s available colors on the Audi website, here are a few that might work for us.

unnamed (2).png
unnamed (1).png
unnamed.png

Digital Media Collaboration: Week One

In this course we will spend the whole quarter working with a small group to create a video with in a car in it, similar to a car commercial. We also have mentors from The Mill for this class. We got assigned our teams on the second class, my teammates are Christo and Zach, and we were able to start brainstorming some ideas. Christo show us this video and we all really liked the particle effect in the video. We agreed that would be a more interesting effect than the typical sand and dirt. We did agree that the explosion in the video may be a bit much though so I edited a screen shot to look more like what we’re going for.

particle_concept_edit.jpg

We also agreed that since the particles are illuminated it would be best if would video took place at night, similar to our reference video. We also found a old race track that would make for a good filming location since it’s filled with big turns, like in the reference video.

locref.jpg

Another thing we want to do in the video if we have time for it is make the car transform. Christo is an animation major and has done something similar before, so if we have the time to create a shot with the car transforming into something else, like an animal, like it does in the video, then we will try to do that. We already have tests of the particles and the transforming so it’s exciting to see this idea take form as we prepare for our pitch.